Partitioning a hard drive allows you to divide your storage space into separate sections, which can be useful for organizing files, dual-booting operating systems, or improving system performance. In this guide, we’ll walk you through the process of partitioning a hard drive using the built-in Windows Disk Management tool, available in both Windows 10 and Windows 11.
What is disk partitioning?
Disk partitioning is the process of dividing a single physical hard drive into multiple logical drives. Each partition appears as a separate drive in Windows File Explorer, with its own drive letter (like C:, D:, E:, etc.). Users can create multiple partitions to organize data efficiently, such as separating backup files and media.
Why partition your hard drive?
There are several reasons you might want to partition your hard drive:
- Organize files and data
- Separate operating system files from personal data
- Dual-boot multiple operating systems
- Improve system performance
- Create a recovery partition
- Maintain system performance and usability
⚡ Recommended for Storage Management
High Storage Capacity!
HP ZBook Power 16 G11
- 512GB SSD storage for flexible partitioning
- Intel® Core™ Ultra processor for fast performance
- 16GB memory for smooth multitasking
512GB SSD storage | Intel® Core™ Ultra processor | 16GB memory
Windows Partition Manager: Disk Management
Windows includes a built-in partition manager called Disk Management. This tool allows you to create, delete, format, and modify partitions without the need for third-party software.
How to partition a hard drive in Windows 10 and 11
Follow these steps to partition your hard drive:
Step 1: Open Disk Management
- Right-click on the Start button
- Select “Disk Management” from the menu
Alternatively, you can:
- Press Windows key + X
- Select “Disk Management” from the menu
Step 2: Choose the drive to partition
In the Disk Management window, you’ll see a list of your drives and their current partitions. Identify the physical drive you want to partition.
Step 3: Shrink the existing volume
If you’re partitioning an existing drive with data:
- Right-click on the volume you want to shrink
- Select “Shrink Volume”
- Enter the amount of space to shrink in MB
- Click “Shrink”
Step 4: Create a new partition
- Right-click on the unallocated space
- Select “New Simple Volume”
- Follow the New Simple Volume Wizard:
- Choose the volume size
- Assign a drive letter
- Format the partition (usually NTFS)
4. Click “Finish”
When creating a new partition, it’s crucial to manage data on the storage device carefully to avoid data loss.
How to format a hard drive in Windows 10 and 11
Formatting a drive prepares it for use and creates a new file system. Here’s how to format a drive:
- Open Disk Management
- Right-click on the partition you want to format
- Select “Format”
- Choose a file system (usually NTFS)
- Name the volume (optional)
- Select “Perform a quick format” (unless you need a full format)
- Click “OK”
Warning: Formatting will erase all data on the partition. Make sure to back up important files before formatting. A portable external hard drive is a great tool to keep your data safe at this step.
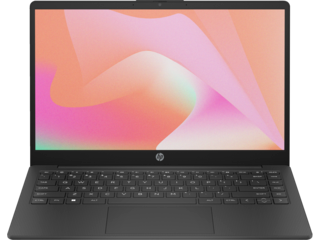
64GB eMMC storage
Intel® Celeron®
4GB RAM
14" HD display
256GB PCIe® NVMe™ SSD
AMD Ryzen™ 5
8GB DDR4 RAM
14" HD display
512GB SSD storage
Intel® Core™ Ultra
16GB memory
16" WUXGA display
HP ZBook Power 16
$1,045.44
Advanced partitioning options
For more advanced partitioning needs, consider these options:
Windows 11 Partition Manager
Windows 11 includes an updated Storage Spaces feature, which allows for more advanced storage management:
- Open Settings
- Go to System > Storage > Advanced storage settings > Storage Spaces
- Create and manage storage pools and spaces
Third-party partition manager software
For more advanced features, you might consider third-party partition manager software. These tools often offer additional functionality like:
- Non-destructive partition resizing
- Partition recovery
- Disk cloning
- Advanced formatting options
Tips for partitioning and formatting
- Always back up your data before partitioning or formatting
- Leave enough free space on your main partition for the operating system
- Use appropriate file systems for your needs (e.g., NTFS for Windows, exFAT for cross-platform compatibility)
- Regularly check your partitions for errors using Windows’ built-in tools
- Identify and select the correct physical disks before partitioning to avoid data loss and ensure proper installation
Conclusion
Partitioning a hard drive in Windows 10 and 11 is a straightforward process using the built-in Disk Management tool. By following this guide, you can easily create new partitions, format drives, and organize your storage space more effectively. Remember to always back up your data before making changes to your drive’s partitions.
Whether you’re setting up a new system, reorganizing your files, or preparing for a dual-boot setup, mastering the art of disk partitioning will help you make the most of your storage space and improve your overall computing experience. The steps provided are applicable to various Windows versions, including Windows Vista, making this guide a valuable resource for users across different Windows platforms.
About the Author
Daniel Horowitz is a contributing writer for HP® Tech Takes. Daniel is a New York-based author and has written for publications such as USA Today, Digital Trends, Unwinnable Magazine, and many other media outlets.


