Exploring today's technology for tomorrow's possibilities
Copied link!
How to Fix an HP Laptop That Won’t Turn On
Michelle Wilson
|
August 29, 2024
Reading time: 11 minutes
When your HP laptop won’t turn on, it can be frustrating and concerning, especially when you have important work to do. The good news is that most power issues can be resolved in under 30 minutes with simple troubleshooting steps. In most cases, HP laptops fail to power on due to three common issues: a depleted battery that needs charging, loose power connections, or a system that requires a hard reset. Before assuming the worst, try these proven solutions that work for 90% of HP laptop power problems.
Immediate Solutions (Try These First)
Before diving into detailed troubleshooting, try these three quick fixes that resolve most HP laptop power issues:
Power Button Hard Reset - 30 seconds
The easiest and most effective solution is performing a hard reset. Turn off your HP laptop completely, disconnect the AC adapter, and remove the battery if possible. Press and hold the power button for 15 seconds to discharge any residual electrical charge. This clears temporary configurations that may prevent your laptop from starting. Reconnect the power adapter (and battery if you removed it) and try turning on your laptop.
Check Power Connections - 1 minute
Verify that your AC adapter is properly connected to both the laptop and wall outlet. The connection should be secure at both ends, with no wobbling or looseness. Check if the LED indicator on your power adapter brick is lit - this confirms power is flowing from the outlet. If your laptop has a charging LED near the power port, it should glow white, amber, or green when properly connected. Try a different wall outlet if the adapter LED isn’t lighting up.
Proper Power Adapter Connection Points
Figure 1: Check these connection points when your laptop won't turn on while plugged in
Battery Quick Test - 2 minutes
If your HP laptop has a removable battery, take it out and inspect the metal contact points for any corrosion or damage. Clean them gently with a dry cloth if needed. Try powering the laptop with just the AC adapter connected and no battery installed. If it turns on, your battery may need replacement. For laptops with non-removable batteries, connect the AC adapter and let it charge for at least 15 minutes before attempting to power on.
⚡ Recommended Solution - Reliable Power Delivery
Power Solution!
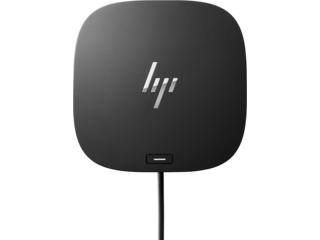
HP USB-C Dock G5
4.0/5
Stable 100W power delivery through USB-C
Connect up to three displays simultaneously
USB ports for all your essential peripherals
100W power delivery | Multiple display support | USB connectivity
MSRP
$259.00
Video Tutorial
Learn how to troubleshoot HP notebook power issues with this official HP Support video guide. This comprehensive tutorial walks you through each diagnostic step, from checking your power adapter to running HP Hardware Diagnostics.
HP Support•Power Troubleshooting Guide
View Full Transcript
How to troubleshoot an HP Notebook that does not power on or hold a charge
Complete transcript of the troubleshooting video guide
If your Notebook computer battery does not power the Notebook or hold a charge, then you might be experiencing a battery issue.
A few symptoms of a battery related issue include:
The battery indicator light, located near the power icon, does not glow or always blinks.
And, your computer might also operate correctly when it is connected to the AC adapter, but not when using battery power.
Follow these steps to troubleshoot your laptop to determine if the battery needs to be replaced.
Step 1: Troubleshoot the notebook power supply
Make sure that you are using the AC adapter that came with your Notebook to prevent damage to the battery. Using an incorrect or older adapter can cause battery issues.
If you need to purchase a replacement AC power supply, make sure that you use the model number of the computer and check for the correct part number for the adapter from the HP Parts Store at parts.hp.com.
To troubleshoot the power supply, plug the AC adapter directly into a wall outlet, not a surge protector or alternative power source.
Make sure that the Notebook is receiving power from the power source by checking the following areas:
Verify that the power cord is securely connected to the computer and to the AC adapter.
If the AC adapter connection to the computer is loose, the connector might be damaged and require repair.
Verify that the power button or power light is illuminated when the computer is on.
Depending on the model, the battery indicator light might be white, green, or amber when the power adapter is connected and is providing power to the computer.
If the AC adapter brick features an LED power indicator, check to see if the light is lit to verify that the computer is receiving power from the wall outlet.
If the light does not turn on, try plugging the AC adapter into a different outlet to check the power source.
If the light still is not lit, you might need to replace the AC power adapter.
Feel along the length of the AC power cable and check for any kinks or breaks. Check the ends for any broken connections and inspect the AC adapter brick. If it is discolored or warped, or if there are any problems with the power cord or connections, contact HP to replace the AC adapter.
Step 2: Test the AC adapter using HP PC Hardware Diagnostics
If the computer starts, you can use HP software to test the AC adapter. Make sure the AC adapter is connected to the computer and to a wall outlet.
HP PC Hardware Diagnostics is troubleshooting software that comes preinstalled on HP computers running Windows or can be downloaded from support.hp.com/help/hp-pc-hardware-diagnostics.
In Windows, search for and open HP PC Hardware Diagnostics.
Select Device Check.
Select the Power dropdown menu.
Select AC Adapter test and then click Run selected tests.
When the test is finished, the results display.
If the test passed, there is no issue with the AC adapter and it does not need replacing.
If the AC adapter fails the test, select More info and write down the information so you have it available and contact HP Customer Support at support.hp.com/contact.
Step 3: Troubleshoot the Notebook battery
If it was determined in the previous step that there is no issue with the AC adapter, you can now troubleshoot the battery.
For HP Notebooks with a removable battery, flip it over to access the bottom, and unlock the battery to remove it.
Check the contact points to make sure that they are not damaged.
Unplug all USB devices from the notebook if any are connected.
Disconnect the AC power cable.
Insert the battery back into the battery compartment.
Plug the AC adapter into the computer and into a wall outlet, and then allow the battery to charge for 15 to 30 minutes.
Note: The power light, located near the power icon, glows while the battery is charging.
Unplug the power cord from the Notebook.
Press the Power button to start the computer using only the battery as the power source.
If the computer turns on, the battery is functioning.
If the computer does not turn on, contact HP Customer Support for a battery replacement.
For computers that do power on, HP PC Hardware Diagnostics can also be used to troubleshoot the battery.
In Windows, search for and open HP PC Hardware Diagnostics.
Select Device Check.
Select the Power dropdown menu.
Select Battery check and then click Run selected tests.
When the test is finished, the results display.
Just like with the AC adapter test, if the results display as passed, there is no issue with the battery and it does not need to be replaced or repaired. If the battery fails the test, select More info and write down the information so you have it available and contact HP Customer Support at support.hp.com/contact.
If the quick solutions didn’t work, follow this comprehensive troubleshooting guide to identify and fix your HP laptop’s power issue.
Step 1: Troubleshoot the Power Supply
Your HP laptop requires the correct power adapter to function properly and charge the battery. Using an incorrect or damaged adapter is one of the most common causes of power problems.
Verify you’re using the correct HP adapter
Always use the AC adapter that came with your HP laptop or an official HP replacement. Using third-party or incorrect voltage adapters can damage your battery and prevent your laptop from powering on. Check the adapter label for your model number - it should match your laptop’s requirements. If you need a replacement, visit parts.hp.com and enter your laptop model to find the correct adapter .
Check all power connections and cables
Examine the entire length of your power cable for any cuts, kinks, or exposed wires. Pay special attention to stress points near the adapter brick and where the cable connects to your laptop. The adapter brick itself should not be discolored, warped, or emit any burning smell. Check that the plug fits snugly into your laptop’s power port without wiggling. A loose connection often indicates port damage that requires professional repair.
Power Cable Inspection Guide
1Near AC Adapter
Common stress point where cable exits the adapter. Check for fraying or exposed wires.
2Cable Middle
Look for kinks, sharp bends, or areas where the cable feels unusually warm.
3Laptop Connector
Inspect for bent pins, loose connections, or damage where cable plugs into laptop.
⚠️ Stop Using If You See:
Exposed or frayed wires
Burn marks or melted plastic
Cable feels hot to touch
Loose or wobbly connections
Safety Tip: If you notice any of these damage signs, stop using the adapter immediately and contact HP Support for a replacement at support.hp.com/contact
Figure 2: Common power cable damage points - inspect these areas before troubleshooting
Understanding LED indicators
HP laptops use LED lights to communicate power status. When connected to AC power, the LED near your power port typically shows:
White or green: Battery is charged or charging normally
Amber or orange: Battery is charging but low
Blinking: Potential battery or power adapter issue
No light: No power detected from adapter
The AC adapter brick also has an LED that should remain solid when plugged into a working outlet. If this LED is off, the adapter isn’t receiving power or has failed.
HP Laptop Power LED Indicator Guide
White/Green
Battery charged or charging normally
Amber/Orange
Battery charging but low (below 90%)
Blinking
Battery or power adapter issue
No Light
No power detected from adapter
Note: LED behavior may vary by HP model. EliteBook and ProBook series typically use white indicators, while Pavilion and Envy models often use amber/orange. Consult your model's user manual for specific LED meanings.
How to inspect for physical damage
Carefully examine your power adapter and laptop charging port. Look for bent pins in the charging port, burn marks, or melted plastic. Feel along the adapter cable for hot spots or bulges. If you notice any physical damage, stop using the adapter immediately and contact HP Support for a replacement.
Step 2: Run HP PC Hardware Diagnostics
HP laptops include built-in diagnostic tools that can identify power-related hardware issues. These tests check both your AC adapter and battery functionality.
How to access diagnostics in Windows
If your laptop powers on but has charging issues, use HP PC Hardware Diagnostics for Windows. Search for “HP PC Hardware Diagnostics” in the Windows search bar and open the application . If your laptop won’t boot to Windows, turn it off completely, then press the power button and immediately press F2 repeatedly until the diagnostics menu appears.
HP Support•PC Hardware Diagnostics Guide
View Full Transcript
How to use HP PC Hardware Diagnostics in Windows
Complete transcript of the HP PC Hardware Diagnostics video guide
By running HP PC Hardware Diagnostics for Windows you can isolate and identify hardware issues on your HP computer.
HP PC Hardware Diagnostics for Windows comes pre-installed on new HP computers or can be downloaded from hp.com/go/techcenter/PCDiags.
To open the utility in Windows, search for and select “HP PC Hardware Diagnostics Windows”. If prompted, click Yes to allow the application to make changes to your computer.
Note: If you are using a computer designed for gaming, such as an HP Omen PC, the app might appear differently, but the functions are the same.
The app opens to the System Information tab.
From here you can:
View system specifications
Search for updates for the Basic Input-Output System, or BIOS for short
Launch diagnostics for the Unified Extensible Firmware Interface, or UEFI for short
Contact the HP Support community
At the top of the app there are multiple tabs that allow you to check different elements of your computer.
The Computer Tests tab allows you to run a Fast System test which checks your system to make sure main components are functioning properly. Selecting Start Fast Test begins the test. As each test completes, it displays a Passed or Failed status next to the test. You can select the See Description option to the right to learn more.
The Device Check tab allows you to run individual tests on device sub-systems. For example, if you are experiencing audio issues, you can select Audio to run isolated tests on that part of your computer.
The Test Results tab displays the results of any tests that you have run. You can select a test and click View Full Details on the right to learn more about why the test passed or failed.
The Automated Scans tab allows you to schedule when you would like system scans to be performed. You can select the type of scan you would like completed as well as the time and frequency that the scan is performed.
On the left-hand side of HP PC Hardware Diagnostics, there are a few more tabs that allow you to access more helpful information.
The Customer Support tab allows you to use multiple avenues to reach out for support. You can use HP Smart support, go to the support website, initiate guided troubleshooting, and chat with a support agent.
The Feedback tab allows you to leave reviews so that HP can improve the diagnostics tool.
Lastly, the Language tab allows you to select your preferred language so that you can easily perform the diagnostics.
On the bottom left, the Privacy option allows you to adjust how you share your diagnostic information and the Settings option allows you to adjust display settings.
In HP PC Hardware Diagnostics, select “Component Tests” then “Power” and choose “AC Adapter Test”. Connect your AC adapter before running the test. The diagnostic will verify that your adapter provides the correct voltage and amperage. The test typically takes 2-3 minutes. A “Passed” result means your adapter is functioning correctly. If it fails, note the failure ID for HP Support.
Running the battery test
Select “Battery Test” from the Power menu. This comprehensive test checks your battery’s ability to hold charge, its overall health, and charging circuitry. The test may take 5-15 minutes depending on your battery capacity. Results include:
Passed: Battery is functioning normally
Calibration needed: Battery requires calibration
Replace: Battery has degraded and should be replaced
Failed: Battery has failed and must be replaced
Understanding test results
Document any failure IDs or error codes shown during testing. These codes help HP Support quickly identify the exact component causing your power issue. Even if tests pass, the diagnostic logs provide valuable information about your system’s power components.
Step 3: Battery Troubleshooting
Battery issues are a common cause of HP laptops not turning on. The troubleshooting approach differs based on whether your battery is removable.
For removable batteries
Turn your laptop over and locate the battery release latches. Slide them to unlock and carefully remove the battery. Inspect the battery contacts (gold or silver metal strips) for any corrosion, dirt, or damage. Clean them gently with a dry microfiber cloth. Check the battery itself for swelling, leaks, or physical damage - if present, do not reinstall it.
With the battery removed, connect only the AC adapter and try powering on. If successful, the battery is likely faulty. If not, the issue lies elsewhere. When reinserting the battery, ensure it clicks securely into place and the latches lock properly.
For non-removable batteries
Modern HP laptops often have internal batteries that users cannot remove. For these models, perform a “battery reset” by holding the power button for 15 seconds while the AC adapter is disconnected. Then connect the adapter and charge for at least 30 minutes before attempting to power on. The charging LED should illuminate during this time.
15-30 minute charging test
Connect your AC adapter and allow the laptop to charge undisturbed for 15-30 minutes, even if no LEDs illuminate initially. Deeply discharged batteries may need this initial charge period before showing any signs of life. After 30 minutes, attempt to power on while keeping the adapter connected. If successful but the laptop won’t run on battery alone, continue charging for 2-3 hours before testing battery operation.
Everyday users with basic needs
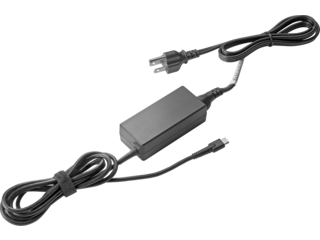
45W power delivery
Compact and portable
Perfect for ultrabooks
Budget-friendly solution
45W USB-C Adapter
MSRP
$39.00
Professional users needing more power
110W power delivery
Fast charging capability
Works with multiple devices
Universal compatibility
110W USB-C Charger
MSRP
$69.00
High-performance computing needs
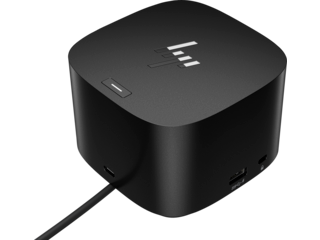
120W power delivery
Full docking station
Multiple port expansion
Enterprise-grade reliability
Thunderbolt Dock 120W
MSRP
$259.00
Common Power Problems and Solutions
Different symptoms often point to specific issues. Here’s how to address the most common HP laptop power problems.
“Laptop Plugged In But Won’t Turn On”
This frustrating issue typically stems from power delivery problems rather than the laptop itself.
First, verify your power source by testing the outlet with another device. Surge protectors and power strips can fail, so plug directly into a wall outlet. Ensure you’re using an outlet that isn’t controlled by a wall switch. Check if the outlet’s circuit breaker has tripped.
Next, examine the charging port on your laptop. Debris, dust, or bent pins can prevent proper connection. Use compressed air to clean the port gently. The adapter plug should insert smoothly and fit snugly - any looseness indicates port damage requiring professional repair.
If the charging LED flickers or turns off when you adjust the adapter cable, you likely have a failing adapter or damaged charging port. Try gently wiggling the connector - if the LED responds, the connection is faulty.
Laptop Plugged In But Won't Turn On
START
↓
Check outlet - Test with another device
↓
Outlet working?
YES ↓
Check adapter LED
NO ↓
Try different outlet
↓
Adapter LED lit?
YES ↓
Check port
NO ↓
Replace adapter
↓
Hard Reset - Hold power 15 sec
↓
Laptop powers on?
YES
✓ Resolved
NO
Contact HP
ActionDecisionSuccess
“Black Screen But Power Lights Are On”
When your HP laptop shows power indicators but the screen remains black, you’re dealing with a display issue rather than a power problem.
First, listen for startup sounds like fans spinning or hard drive activity. These indicate the laptop is powering on but not displaying. Try brightening the screen using the function keys (usually Fn + F2 or F3) as the brightness may be set to minimum.
Connect an external monitor using HDMI or VGA. If the external display works, your laptop screen or display cable has failed. If neither display works, you may have graphics card or motherboard issues.
Perform a hard reset by removing the battery (if possible) and AC adapter, then holding the power button for 60 seconds. This can resolve display initialization problems.
Model-Specific Issues
Different HP laptop series have unique power-related quirks and solutions.
HP EliteBook power problems: EliteBooks may require removing both the main battery and CMOS battery for a complete reset. The CMOS battery is usually accessible through a small panel on the bottom. Remove it for 5 minutes before reinstalling.
HP Pavilion common issues: Pavilion models often experience power button failures. Try using the keyboard power button (if available) or connecting the AC adapter to trigger automatic startup. Some Pavilions power on automatically when the lid opens with AC connected.
HP Envy troubleshooting: Envy laptops may enter a protection mode after power surges. Disconnect all peripherals and external devices, remove the battery if possible, and hold the power button for 30 seconds. Wait 10 minutes before reconnecting power.
HP All-in-One specific solutions: The HP All-in-One 24-f0137c and similar models have external power supplies that commonly fail. Check if the power brick’s LED is lit. These models require exact voltage matching - using an incorrect power supply won’t work even if the connector fits.
Where to Find Your HP Laptop Model Number
Battery Compartment
For removable batteries. Remove battery to check underneath.
Bottom of Laptop
Most common location. Look for a white or silver sticker with barcodes.
Service Door Panel
Under RAM or hard drive access panel. May require removing screws.
Common HP Model Number Formats:
15-cs3073cl
Pavilion Series
840 G7
EliteBook Series
13-ah0052nr
Envy Series
💡 Quick Tip: Take a photo of your model number sticker for future reference. You'll need this information when contacting HP Support or ordering replacement parts.
Advanced Troubleshooting
When basic troubleshooting fails, these advanced techniques may resolve deeper hardware or firmware issues.
Hardware component checks
RAM problems can prevent your HP laptop from powering on. If comfortable with hardware, locate the RAM access panel (usually on the bottom) and reseat the memory modules. Remove them completely, clean the contacts with a soft eraser, and firmly reinstall. Try booting with just one RAM stick if you have multiple modules.
The CMOS battery maintains BIOS settings when main power is removed. A dead CMOS battery can cause startup failures. On most HP laptops, it’s a small coin-cell battery (CR2032) accessible through the bottom panel. Replace it if your laptop is over 3 years old.
Listen for beep codes when attempting to power on. HP laptops use specific beep patterns to indicate hardware failures:
1 long, 2 short beeps: Video card issue
Continuous beeping: RAM problem
1 short beep: Normal startup (if no display, screen issue)
HP Laptop Beep Code Diagnostic Guide
When powering on, listen for these beep patterns that indicate specific hardware issues:
1 Short Beep
Normal startup - System boots successfully
Pattern:
(0.2 sec)
Continuous Beeping
RAM Problem - Memory modules need reseating or replacement
Pattern:
...(repeating)
1 Long, 2 Short Beeps
Video Card Issue - Display adapter problem detected
Pattern:
--
1 Long, 3 Short Beeps
System Board Failure - Motherboard issue detected
Pattern:
---
How to Use This Guide
Power on your laptop and listen carefully to the beep sequence
Count the number of beeps and note if they're long or short
Match the pattern to the descriptions above
If no beeps occur, see the "Black Screen" troubleshooting section
Document the exact beep pattern before contacting HP Support
BIOS reset procedures
Corrupted BIOS settings can prevent startup. To reset:
Turn off the laptop completely
Press and hold Windows key + B
While holding these keys, press the power button for 1 second
Continue holding Windows + B for 15 seconds
The screen may remain black for up to 40 seconds before BIOS recovery starts
If successful, you’ll see BIOS recovery options. Select “Reset BIOS to default” and restart.
When hardware failure is likely
Consider professional repair or replacement when:
Multiple components test as failed in diagnostics
Physical damage is visible (burnt smell, melted plastic, liquid damage)
The laptop is over 5 years old with original battery
Repair costs exceed 50% of replacement value
You hear grinding, clicking, or unusual electronic sounds
When to Contact HP Support
Before contacting support, complete this checklist to expedite your service:
Complete checklist of steps to try first:
Performed 15-second hard reset
Tested with known-good AC adapter
Tried different power outlet
Removed all USB devices
Ran HP Hardware Diagnostics (note any error codes)
Tested with battery removed (if removable)
Attempted BIOS reset
Checked for physical damage
Information to gather before calling:
Laptop model number (on bottom label)
Serial number
Purchase date and store
Windows version (if accessible)
Error codes from diagnostics
LED behavior description
When problem started
Recent changes (drops, spills, updates)
Warranty considerations: Check your warranty status at support.hp.com/checkwarranty . Standard warranties cover manufacturing defects but not accidental damage. HP Care Packs may include accidental damage protection. Out-of-warranty repairs typically cost $200-400 for power-related issues.
Support contact details: Visit support.hp.com/contact or call 1-800-474-6836 for US support. Have your serial number ready for faster service. Chat support is available 24/7 for basic troubleshooting.
Preventing Future Power Issues
Proper maintenance extends your HP laptop’s lifespan and prevents power problems.
Battery maintenance tips
Modern lithium-ion batteries last longest when kept between 20% and 80% charge. Avoid completely draining the battery regularly. If storing your laptop for extended periods, charge to 50% and remove the battery if possible. Run a full discharge cycle monthly to maintain battery calibration.
Enable HP Battery Health Manager in BIOS to optimize charging patterns based on your usage . This feature limits maximum charge to preserve long-term battery health when you primarily use AC power.
Proper adapter care
Always disconnect the adapter by gripping the plug, not the cable. Avoid wrapping the cable tightly or bending it sharply near connectors. Store adapters loosely coiled without kinks. Keep the adapter brick ventilated - don’t cover it with fabric or papers while charging.
Use only HP-certified adapters or exact replacements. Third-party adapters may provide inconsistent power, damaging your battery and internal components over time.
Regular diagnostic recommendations
Run HP Support Assistant monthly to check for driver updates and battery health . Schedule quarterly Hardware Diagnostics tests to catch issues early. Update BIOS annually or when HP releases critical updates for your model.
Monitor battery wear level in Windows Battery Report (run “powercfg /batteryreport” in Command Prompt). Replace batteries showing over 50% wear or under 2-hour runtime.
HP Laptop Battery Maintenance Schedule
Daily
✓ Avoid complete discharge
✓ Keep charge between 20-80%
✓ Use on battery at least once
Monthly
✓ Full discharge cycle
✓ Run HP Battery Check
✓ Clean power contacts
Quarterly
✓ HP Hardware Diagnostics test
✓ Check battery wear level
✓ Update power drivers
Annually
✓ BIOS update check
✓ Battery health evaluation
✓ Consider replacement if >50% wear
💡 Pro Tips:
• Enable HP Battery Health Manager in BIOS for optimized charging
• Store batteries at 50% charge if not using laptop for extended periods
• Run powercfg /batteryreport in Command Prompt to check battery health
Frequently Asked Questions
Why won't my HP laptop turn on even when plugged in?
This usually indicates a power delivery issue. First, verify your outlet works by testing another device. Check that your AC adapter's LED is lit and the connection is secure. Try a different outlet and ensure you're using the correct HP adapter. If these steps don't work, perform a hard reset by holding the power button for 15 seconds.
How do I force restart my HP laptop?
To force restart an HP laptop, first disconnect the AC adapter and remove the battery if possible. Press and hold the power button for 15-30 seconds to discharge residual power. Reconnect the power adapter (without battery initially) and press the power button normally. This hard reset clears temporary configurations that may prevent startup.
What do different power LED colors mean?
HP laptop LED indicators communicate power status: White or green means the battery is charged or charging normally. Amber or orange indicates the battery is charging but currently low. Blinking LEDs suggest potential battery or adapter issues. No light means no power is detected from the adapter, indicating a possible adapter failure or connection problem.
Can a dead CMOS battery prevent startup?
Yes, a dead CMOS battery can prevent your HP laptop from starting properly. The CMOS battery maintains BIOS settings when main power is disconnected. If it's dead, your laptop may fail to boot or lose system settings. Replace the CR2032 coin battery if your laptop is over 3 years old and experiencing startup issues.
How long should I charge before attempting to turn on?
Allow your HP laptop to charge for at least 15-30 minutes before attempting to power on, even if no LEDs illuminate initially. Deeply discharged batteries may need this initial charge period before showing signs of life. For completely dead batteries, charge for 2-3 hours before testing. Keep the adapter connected during your first startup attempt.
Is it safe to use non-HP power adapters?
Using non-HP power adapters is not recommended and can damage your laptop. Third-party adapters may provide incorrect voltage or unstable power, potentially harming your battery and internal components. Always use the AC adapter that came with your HP laptop or an official HP replacement. Check parts.hp.com for the correct adapter model for your specific laptop.
Quick Reference Summary
Immediate fixes (under 5 minutes):
Hard reset: Hold power button 15 seconds
Check connections: Verify AC adapter and outlet
LED check: Confirm power and charging indicators
Basic troubleshooting (5-30 minutes):
Battery removal test (if applicable)
15-30 minute charge attempt
Different outlet/adapter test
HP Hardware Diagnostics
Advanced solutions (30+ minutes):
BIOS reset procedure
RAM reseating
CMOS battery replacement
External display test
Success rates by solution:
Hard reset: 60% success rate
Power connection fix: 20% success rate
Battery replacement: 15% success rate
Other hardware issues: 5% require professional repair
Most HP laptop power issues resolve within 30 minutes using these troubleshooting steps. If problems persist after trying all solutions, professional diagnosis is recommended to prevent further damage.
About the Author
Michelle Wilson is a contributing writer for HP® Tech Takes. Michelle is a content creation specialist writing for a variety of industries, including tech trends and media news.